Showing posts with label plant care. Show all posts

Monday, April 6, 2009

Exotic Plant?


Dear George,
I came across your site whilst searching for some information about this plant (I hope you can open the attachment). I can't find a similar picture on the internet, and the lady who sold it to me (in a rather upmarket shop in town) yesterday didn't know the exact name (but muttered it could be from a family beginning with Ga...?). I gave it as a present to our local priest today, who really appreciated it and said it's going in their Easter garden, but I would like to let him know what it is..

I was told it doesn't like direct sunlight, only partial shade, but no tips as to watering / feeding. Because the leaves are cactus-like I would assume it doesn't want too much water. A lady I bumped into at the supermarket, after asking me where I got it from, suggested it might like to draw its own (lukewarm) water from a saucer.

I don't know anything about plants, and I've never come across this particular specimen during my travels. Could it be from Thailand? And, most importantly, is it safe to have around?

Any help would be really appreciated.

Thank you for your time and best wishes

Alessia, London (UK)


Alessia,

Greetings from across the pond.....

What you have is a Bromeliad, the botanical name is Aechmea ‘Blue tango’. This is a man-made cultivar, which means it doesn’t exist in nature.
Here is some culture on these plants…..

Their native soil is Middle and South America. They thrive in the lowlands of the tropical forests and even in some higher regions (up to 4000 m) of Sierra Madre and the Andes.

They thrive in different climate zones: tropical and monsoon climate of the rainforests, subtropical savannah climate with dry period either during summer or winter, subtropical steppe climate and subtropical highland savannah climate.

It is important to know the climate zone of origin of certain bromeliad, as you will be able to offer your plant convenient conditions.

Bromeliads are epiphytes. They do not drain the host tree, they are simply attached to the rough bark of the trunk or branches. They grow high in the tree crowns to bath in the shaded light. Some thrive even on the ground. They gather rainwater with all necessary nutrients in their specially shaped leaf rosettes. Some sorts that thrive in wet regions regulate the quantity of water with special sucking scales on the rosette leaves that open or close according to the needs. Sorts from the dry regions do not have distinctive rosettes, instead their surface is covered in scales that prevent vaporization.

Bromeliads flower only once in a lifetime. After the flowering the parent plant slowly dies, but new sprouts that appear around it continue the life.. We can transplant these sprouts in their own flowerpots filled with special soil mixture for bromeliaed. Bromeliads should flower in 2-3 years provided with appropriate temperature, humidity and enough light. We recommend buying the plant that is close to its flowering period.*

I hope this helps you and enjoy your lovely bromeliad.

*tri.exotica

Tuesday, November 11, 2008

Hibiscus care and maintenance


My 3 year old hibiscus tree only got two flowers this year and they bloomed in October. All summer I had it outside in CT and it had beautiful green leaves but no flowers.

Last year it flowered a lot in August. I brought it in for the winter and kept it near a northern window where it lost its leaves but grew them back before the spring.

I now have it in the same window but am not sure what to do with it so that it will bloom in the summer next year.

I appreciate any advice. Diane


Hibiscus lutea braided


Some tips on care for your hibiscus…

Hibiscus are tropical plants that must have at least a couple of hours of direct sunlight everyday, and more importantly warmth. A bright south or west facing window is the best. In the winter be careful your plant does not get a draft, this can cause it to drop its leaves.

This plant likes water but does not like to be wet. A tip that may help you is to water the plant with slightly warm water in the winter.

It is also a good practice to prune your hibiscus around August to October. Prune 2 or 3 nodes (the point where leaves and buds arise from) down the branches, this will encourage fuller growth and more budding.

Lastly, it is a good idea to feed your hibiscus during the growing season. Growing in a container, a plant will quickly use up its resources. This will help new growth and bud formation. A standard fertilizer containing nitrogen(N), phosphorus(P) and potassium(K) will be fine. Nitrogen helps a plant develop healthy, green foliage, while potassium will encourage good root development and improved flowering and potassium helps a plant build up storage for a dormant period.

I hope this helps, keep us updated.

Monday, August 25, 2008

Staghorn Ferns as Houseplants in NYC

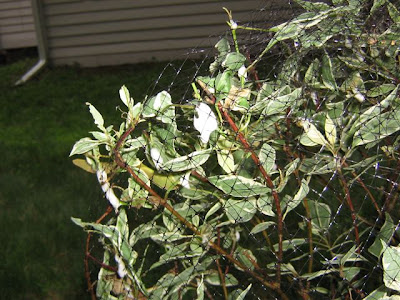
The curled, more rigid feel to the leaves of this staghorn fern in the office implies that it is not in as humid an environment as it would like, but regular misting and watering are certainly helping to keep it going.

Question(s):
i'm a big fan of your blog. i'm a patio/indoor gardener and have recently become rather obsessed with ferns - my boyfriend (who's a landscaper and gardener as well) gave me a staghorn fern as a gift. i have been googling the fern and have read some contrasting advice (it loves bright light, it should be in a shady spot; don't over water and even allow it to slightly wilt so you know you aren't OR always keep the soil evenly damp). Since it's a gift i really want to keep it alive - it's also such a beautiful plant that i would hate to be responsible for killing it.

SO. here's the deal - the fern is rather large and it came in a six inch plastic hanging pot. i have read that i should transplant it into a hanging wire basket lined with sphagnum moss and hang the plant sideways and growth will come out of all sides. would you agree with that? should i line it with the moss and then add peat and then the fern? (also something i read).

in terms light -- my gut instinct with all ferns is to give them part shade. none of my windows get direct bright light but rather i have three big windows with varying levels: bright indirect, medium indirect and low indirect - it is currently in the medium indirect. my patio gets direct light and part of it is always in the shade. would you recommend i keep the fern outside until fall - before any danger of frost?

watering -- always damp? also: would you recommend misting the plant since it like humidity? or is misting pointless?

i think that's about it. please let me know if you have any questions and i really, really appreciate your help with this.

Answer(s):
A staghorn fern (Platycerium bifurcatum) is without question a beautiful and unusual plant, and I personally think they are fabulous. However, I am very glad that you both have plenty of plant growing experience because you will need it as they are not necessarily the easiest houseplant out there. In fact, some books outright say these plants are not suitable for the home, but I think you can prove them wrong. Let me share with you what I know from my experience with them, both in greenhouses and in the home, as well as refer to some great houseplant books we have here in the HSNY Library. Your fern will be a little particular, but with the right care I think you should be able to keep it going for plenty of years to come.

Your fern will produce two types of leaves as it grows. The sterile fronds will be produced at the base of the plant and mature from green to brown. In its natural environment these fronds would adhere themselves to the larger tree branch the fern would be living on, eventually pulling nutrients from the organic matter that would collect between the two organisms. Transplanting it into a wire or wooden (orchid) basket with sphagnum moss is what I would do. Because it is a naturally epiphytic plant the moss should hold enough moisture at the base of the plant between when you water. I would transplant the fern oriented as you want it because the sterile fronds will naturally grown down and around the base of the plant (and the sphagnum moss) as the fertile fronds will continue to grow upright and out in search of light and humidity. My gut instinct is that the extra step of incorporating the peat moss is not necessary, but if it is in a peat-heavy mix now then that might help the transition to be as smooth as possible. I actually bought one mostly in peat moss one time and transplanted it into sphagnum moss soon after getting it. It definitely went through a little shock and stress (granted it was also adapting to my light and humidity) but it survived and I think was happier in the long run being in the sphagnum. I wonder if you might want to keep it in the plastic for a bit longer to make sure it is acclimated to the light and humidity of your place before transplanting, but that is probably me being too conservative.

Light is one of those issues where we have to remember that we live in the city with light levels that are uniquely different than if we were in the country. I would think it would be happiest in as sunny a spot as you can get it. Especially if you received it as a pretty mature plant, I’m guessing it was getting a lot of light in the greenhouse where it was raised. One of my favorite references recommends bright light with some direct sun and that sounds pretty right on to me. When I helped care for staghorn ferns up at NYBG when I was a student they were kept in a house that got a flood of bright, barely diffused light, and they loved it. Here in my office I have one that actually gets a good shot of direct morning sun and I was fearing it might be too much, but the plant is holding up well. If we were in the country I would say otherwise, that some shade would be good, but here we are often searching to find sunlight for our plants before we are searching to find them shade. As far as the debate between inside versus outside, I would try and figure out which area will have higher humidity and stick it there. If you put it outside do not let the nighttime temperature get much below 65 before pulling it inside. It sounds to me like the medium indirect or bright indirect perches inside would be suitable.

Once you have your fern situated in the sphagnum moss I think you should only have to water it about once a week, the same routine as you might water orchids. In addition, once a month or so I would give it a real good drench, even submerge the base of the plant in water for a few minutes, and then let it drain. This can also be a good time to incorporate a light fertilizing, which should be done once a month during the summer months but not so much in the darker seasons. Watering from the base will be a good practice because too much water at the base of the fertile fronds can lead them to get too waterlogged and fall off, and you definitely do not want to lose leaves as staghorn ferns are slow growers. If the plant dries out a little bit between watering that is fine.

I am glad you brought up misting and humidity because this is really the most important thing when it comes to keeping a staghorn fern alive in the home. They require a lot of regular humidity, and drying out too much can be the ultimate downfall of the plant (trust me – I know!). In a greenhouse setting staghorn ferns do great because they get the 60% humidity (or higher) all the time which is ideal. At home I keep mine in the bathroom, where the light and humidity are ample, but even then I mist it occasionally, especially if we have been away for a few days. Here in our office I am always misting the staghorn fern and it seems like I can never do that enough. Again, I try to mist regularly but prevent lots of water from collecting at the base of the fertile fronds. What can I say, I know the plant is a little bit drier than it would prefer, but it is holding on and looking good.

The only other thing that comes to mind is the waxy coating on the surface of the fertile green leaves. That waxy coating helps the plant to retain more moisture in its leaves so do not attempt as some do to clean the leaves and remove it. If some gets wiped off when you transplant that is not the end of the world by any means. It sounds like you know plant care enough not to do that, but worth the quick mention regardless.

I guess the long and the short of it is that you simply can’t forget or neglect a staghorn fern as a houseplant. But if I can keep one alive in a dry office setting then I am sure yours will be just fine once you get it more situated and on a regular regiment. Good luck and let me know how it works out for you.

Thursday, August 21, 2008

Hosta and Slug Damage

(slug damage on Hosta courtesy of University of Illinois Extenstion)

Question:
Should I remove the faded flowers from my hostas?

By August many of my hostas have tiny holes, I assume from some sort of bug or spider. I noticed this year that my new hostas in an area that in not watered as frequently are free from these "holes". Should I water less or do you have a suggestion for what to spray my plants with? It's mostly on the green/white varigated hosta.

Answer:
You can definitely remove the faded flowers from your Hosta. Removing the spent flower spike by pruning back to the foliage from where it emerged will actually be a great help to the plant as you will be redirecting water and nutrients to other parts of the plants that will be eager to make use of it.

As far as the holes, I am 95% sure it is probably slug damage. The best way to tell is actually to go out and inspect your plant late-night with a flashlight, as that is when slugs are most actively chewing away. Don’t forget to look at the undersides of the leaves as well as their tops. I know there are some granular products out there that you can sprinkle on the ground that help wipe out slug populations, but once they are adults this late in the summer I am not sure how effective those products are. I am also not sure if the granular products are very organic as I do not have any of that around to check out the ingredients. To go about a more organic control, the best plan of attack for now is physical removal. Not to mention removing as much of the pests as you can means you do not have to alter your watering schedule too much. Good, deep watering helps freshly planted plants establish healthy roots quickly in your garden so I do not want to recommend cutting back on the water if you can help it. It is gross I know, but after a couple nights you will be able to get a lot of those slugs bagged up and removed from your garden. According to The Organic Gardener’s Handbook of Natural Insect and Disease Control edited by Barbara Ellis and Fern Marshall Bradley, thin copper wire laid around the base of your plants or copper used as garden edging works to deter them, though I have never tried it. You might think I’m crazy but some friends of mine even swear by pans of beer laid underneath the plants used as traps. Either way it comes back to physical removal being one of the best options to prevent future damage of your Hosta. I hope you can get the situation under control so that the slugs do not eventually spread to your new plants. Luckily the one thing about slugs is that they are not nearly as fast moving as some other pests in the garden.

Night Blooming Jasmine on Long Island

(image of Cestrum nocturnum courtesy of Logees.com)

Question:
Hopefully you can help me. I received a night blooming jasmine as a gift. It is currently in a small clay pot. It is doing quite well – I have new growth and blooms.
Living on LI – can I plant this in the ground – will it come back after a NY winter?
If I don’t put it into the ground, what do I do with it once the weather starts to cool off?
What is the care for this plant during the winter months?
Do I pinch after blooming?

Answer:
Night blooming jasmine (Cestrum nocturnum) is what we would consider a “tropical” up here in New York. It is an evergreen shrub, but only hardy through much milder winters down south and in the West Indies where the plant is indigenous. The plant sounds very well situated now so you do not need to change your routine anytime soon. If you have spent blossoms then you can deadhead them with pruners or scissors and remove them in order to redirect water and nutrients to the actively growing portions of the plant. I imagine you have it in a sunny spot and are keeping it well watered which is important as the plant is most active right now. In the fall, say late September or when the evening temps get down to the 60s, I would move it inside to as sunny a location as you can. You will continue to keep the soil moist and slowly cut back on your watering so that by winter you are allowing the soil to dry out a bit between watering. The plant will go through a dormancy period this winter so you will not expect tons of new growth or flowers, but it should certainly survive indoors over-winter. If you feel like you have to do some pruning I might hold off until next year once you have moved it back outside when the days are longer and nights are warmer again.

Bagworms on Bald Cypress in Brooklyn

Question:
A neighbor who works with you noticed that I have bagworm cocoons on 3 of my four bald cypresses, and said that you might know what I should do about it. I took off all of them that I could reach and some had worms in them when I stepped on them. I love my trees and they have been doing well; I really don't want them to have any problems! If you have any ideas I would love to hear! Thanks a lot.

Answer:

When I was studying entomology as part of my training at NYBG I was taught that there are a number of excellent universities that provide information on various garden pests we encounter. As one example, the Ohio State University has a great series of fact sheets on various garden pests and I was able to locate one specifically on bagworms (Thyridopteryx ephemeraeformis). I have added the link, but if for some reason you want a hard copy just let me know and I can drop it in the mail to you.


http://ohioline.osu.edu/hyg-fact/2000/2149.html

Typically I see bagworms on different kinds of junipers, cedars, and arborvitae, but I guess I wouldn't be all that surprised that they are present on your bald cypresses. As you will see on the fact sheet the best thing to try and know about any garden pest is their lifecycle. That way you can then attack them when they are in their most vulnerable stage(s). Your physical control of removing them by hand is the best you can do right now. Also, it never hurts to provide the best overall care for your trees to alleviate other natural stresses. Even though we have had some serious storms we have not had many deep, soaking rains so supplemental irrigation might be a help if you can get a hose to the pits or have gator bags in place. If you can add a thin layer of mulch (only 1-2" of shredded bark or small nuggets) to the base of the trees that helps regulate soil temperature and prevent major soil temp fluctuations, especially at this hot and stressful time of year.
Hope this helps. Let me know if you need anything further.


Tuesday, July 29, 2008

Plant ID: rushes


Question:
We have a rather unusual plant (looks like bamboo?) that has grown rapidly this year. Attached is a photo. Could you please tells us if it is bamboo and should we keep it or get rid of them. I was told that they could cause many problems in an urban environment due to their very invasive root system.

Answer:
The plant you are trying to identify is a type of rush. There are many different genus out there, most of which belong to different plant families, but the cylindrical habit of the plant with those colorful bands are quite distinguishable. There is Equisetum, which is called scouring-rush, a member of the family Equisetaceae. It got its name because early American pioneers used to gather and tie them together in order to use them as scrub brushes to clean their pots and pans. Juncus is another genus, I believe a member of the Juncaceae family, and the well known variety of that genus has more of a corkscrew appearance. If I were to guess what you have in your yard I might guess it to be a striped club rush, botanically known as Schoenoplectus tabernaemontani 'Zebrinus'. However, I must admit I am not 100% certain having only seen only one image of the plant.

Either way the cultural habit of rushes is pretty much the same across the boards. They are clump forming perennials that spread predominantly by underground rhizome. They do best in full sun in a wet environment, and yes, they can spread quite rapidly once established in the landscape. Honestly, whether to keep it or to try and pull it and remove it from your garden is totally up to you. In my backyard they are welcome as a filler in some wet areas; for a client in Brooklyn I pull them every time I visit because they drive her crazy. Because it is such an aggressive grower it can become a weed, defined simply as a plant in the wrong place, even though some species are actually native to North America. If you are worried about other plants being choked out then yes, I would try and pull it and remember to remove as many of the underground stems as possible.

Understanding a New Property

Question:
I have recently moved into my new home, the previously owner had the front landscaped beautifully. In June our 7-10 feet Magnolia tree had a lot of fly and bees and moths around it. As I looked closely I noticed that Magnolia's branches are covered with white oval spot. I have treated with some insect spray twice with no effect. Any suggestions?

Answer:
Thanks for writing. The presence of flies, bees and moths in your new garden is a great sign as they are helpful and necessary pollinators. You do not want to do anything to deter or remove them as they are helping to promote the flowering of your perennials and flowering trees and shrubs. As for the magnolia, I am intrigued. I know some species of Magnolias that have white oval spots that are a natural part of the bark and how it looks and grows. Depending on the size of the spots I wonder if you are looking at lenticels, slightly raised growths on branches that help trees like magnolias and cherries with gas exchange. Next time you inspect the tree see if the spots are uniform throughout the entire tree on branches of the same size. Larger branches will have a different look to the bark as they mature and age. If you find that the oval spots are uniformly all over the tree and the tree appears to be healthy then I am sure there is nothing to worry about. As I say, it might just be the natural characteristic of young magnolia bark. If the oval spots are just on a few branches and you are certain they look different than the rest of the tree then either follow up with me again and describe them as much as you can and/or feel free to send a digital photograph if that is an option as that might help a lot.

Monday, July 28, 2008

Where to Find Perennial Hibiscus

Hibiscus moscheutos,commonly called swamp rose mallow, is a perennial hibiscus that can grow to 6-8' tall. These days growers are coming up with cultivars in a wide range of colors.

Question:
I saw a swamp rose mallow yesterday for the first time and thought it was the most beautiful flower. It reminded me of the tropics. I ran right to the computer and identified the species. Now I want to know where I can buy one. I live in Dix Hills, NY. Any ideas?

Answer:
Hibiscus moscheutos is a great plant, and yes, very tropical looking, especially for being a native species. They do best in a full sun application, especially if you want them to set a lot of flower buds for their late summer bloom. As the common name implies, they also like to have pretty “wet feet”. In the past I have seen them growing naturally in wet, swampy or boggy areas, so make sure they get plenty of irrigation and the soil has good drainage. Certainly if you have any more questions about the cultural needs of this species let me know.

In the past I have found most garden centers or nurseries I drive-by on LI carry this plant in stock. Some places you might find carry them later in the summer because it coinsides with their naturally late-summer flower, but I hope you can track down a few in the next couple weeks. Also, if you know of any place near you that specializes in native plants then they would be a perfect place to approach and ask as well. Lastly, I will forward your query to Katherine Powis here in the HSNY Library as she has some great plant source references at her disposal.

Thursday, July 17, 2008

When Multi-Colored Foliage Turns Green

Question:
I have a notoriously black thumb, much to the chagrin of my Master Gardener mother, and I can't even keep aloe alive. So I asked very specifically what to do with my coleus when I purchased it. It is lush and thriving, but has lost its color!! It was a variagated yellow and brick red when I bought it, and now it's almost entirely green. The man at the farmer's market said to keep it out of direct sunlight and to water every two days. Now I'm second guessing if that means every other day...or if it needs more sun, or what. I did not repot it, as I've had terrible luck with that in my plant-past, too. Any suggestions?

Answer:
There is certainly no need to be too tough on yourself. Chances are you just need to know a little bit more about the plants you are trying to grow compared to your light situation at home. With a little more knowledge you'll be able to grow the right plant in the right place and you will see those thumbs of your change color in no time!

So let's get to the coleus. This plant is considered an annual for us so that means it will not survive the winter outside, but can be kept going in a container inside. If we were talking about the plant being outside in a garden then the grower's advice would be accurate. Coleus (botanically known as Solenostemon scutellarioides) is a sun to shade tolerant annual and can possibly burn and/or bleach out if exposed to an excess of 5-6 hours of direct sun. However, if you have it inside in a container, you want to try and give it as much direct sun as possible. That is the reason for the loss of non-green color. The plant had that great variety of color because it was getting enough sun before. In its present situation it is getting significantly less sun so it is adapting to survive in the environment. The green in plants leaves is chlorophyll, cells devoted photosynthesis, the process of turning sunlight and water into carbohydrates so the plant can grow. Given less light, the plant has been forced to produce leaves that are all green to max-out the plant's ability to photosynthesize and hang in there. To give a personal example, I have a plant called a croton here in the office. Naturally the plant is wildly multi-colored as it is a tropical plant used to warmer and sunnier climates. However, I have it here at my desk growing under fluorescent lights. The full spectrum of light the bulbs emit is enough to keep the plant going but is not the same as a direct sun situation. Therefore, I instead have a plant that is now, like yours, entirely green.

This is how croton might look when you get it at the florist.
This is how my croton looks here in my office. Note: plant is still growing and doing fine and my thumb, still pretty green!


If I were you I would try and move it to a sunnier spot. The plant will adapt to getting more sun and hopefully the interesting color patterns will return. You might, if possible, move it to a sunnier spot in stages. Move it to a brighter spot and care for it for a couple weeks. Then move it to the sunniest spot and continue to care for it there. Moving the plant in stages will help to prevent the green leaves from getting too sunburned or scorched since now they are used to less light. As another example, I move my succulents outside for the summer. At first they might get a little fried,and I might lose some of the older leaves, but they usually bounce back pretty quickly. If you lose some leaves in the process but the plant is still producing new leaves then don't fret it too much.


Otherwise, keep the soil moist this time of year and then water a little less in winter. If the coleus has put out a lot of new growth then you should definitely repot it so that it continues to get the nutrients it needs and has room for its root to grow as well. Usually you want to repot plants when you get them as growers might have them rather pot-bound in order to sell you a full looking item. You only need to repot it to a container a couple inches larger in diameter. Clay will dry out more quickly; plastic will help the soil to retain moisture for longer. A standard brand-name potting soil will be fine. If that makes you nervous give me a ring and either I can talk you through it or we can set a time to bring the plant in to HSNY and we can repot it together.


Wednesday, July 16, 2008

Franklinia and Wisteria Questions

Two separate questions:
1. I live in Raleigh, NC and have a Franklin tree that could use some help. It's now about 3 years old, is planted in an area that includes pines and rhodos. I've seen one that has been kept in a pot and the leaves are beautiful--not like mine.
Could you advise me re: the correct soil ph as well as what the best fertilizer would be. Also, I'll be moving next year--is there a more optimal planting situation than it's present one (it's coming with me).

2. I have a beautiful Wisteria growing along the top of a large Pergola. The problem is that suckers keep breaking through the dirt in my planting bed and are not confined to the trunk area but break out all along the root system. I simply cut them off, but there are so many--is there any way to combat this or stop it altogether without killing the plant?

Answers:
Let’s begin by talking about the Franklin tree, Franklinia alatamaha.

Franklin trees grow best in a moist soil with a fair amount of organic matter. They are also known to have a rather sparsely fibrous root system (according to Dirr’s Manual of Woody Landscape Pants). Given those two factors, I would think that even three years later you want to still be supplying the tree with a fair amount of supplemental irrigation. Do you have a soaker hose or drip irrigation system set up? I would think the tree’s root system should still be saturated two or three times a week for 2-3 hours each time. Hopefully you amended the soil with a fair amount of compost when you planted the tree. If not, I would top dress the area right around the base of the tree with an inch or two of fresh, rich compost. If you have mulched under the tree already then you might want to remove some of the mulch and replace it with, or at least mix in, the compost. Avoid mounding compost or mulch right up against the trunk of the tree. Spreading out a few feet in diameter, your tree pit only needs a couple inches of compost and/or a compost and mulch mix to provide enough insulation for the summer months while providing nutrients to the building root system. If I were you I would not fertilize your tree with anything else at this time, especially if you are going to move it again soon. In fact, I am rarely a fan of fertilizing trees as they will prefer to grow and produce stem and foliage tissue by their own schedule, not ours. Going back to the sparse root system Franklin trees can have, consider hiring some skilled landscapers who are really good at balling and burlapping trees for the transplanting effort. If you really want to save the tree it is going to be worth the extra investment. If the root ball gets really jarred or beaten up during the move you might be dealing with that stress for years. When it gets moved, I would recommend a product called PHC Tree Saver to be incorporated into the hole (amended with compost) once the tree is in place. Here is a link to PHC’s website, and hopefully you can find a retailer near you that carries it: http://www.planthealthcare.com/HT/Mycorrhizal/PHCTreeSaver

The tree can tolerate some shade but you will get the best flower and most glossy leaves if it is in a full sun application. Definitely set up supplemental irrigation in its new home for a year or two to make sure it takes to the new situation. Rely on compost and mulch to provide a steady slow release of nutrients to the root system. A few references speak to soil pH but they do not always agree with each other. A member of the camellia family, Theaceae, I would guess they would like a soil that is slightly acidic to neutral (6.0-7.0). One reference says that they can tolerate slightly alkaline soil, but I have never seen one in that kind of situation. Since wild populations of these trees have not been found in over 200 years it seems to me that there is a fair amount of guessing in this regard. The best specimens are found in slightly colder climates (Massachusetts, Pennsylvania, etc.) but obviously your tree can be grown down in the Carolinas as shown by your friend.

Then there is the wisteria:

Suckers and water sprouts are what we horticulturists call kinds of epicormic growth. The catch with pruning them back this time of year is that the plant is growing most actively and continuing to produce plant growth regulators (what people tend to call “plant hormones”) that will continue to push out new growth from dormant buds right below where you are cutting. The only trick I have learned is to prune those unwanted shoots back in the fall as the plant is beginning to go dormant. In the fall your wisteria is going to produce another plant growth regulator that will aid the plant in going dormant for the winter. By pruning at this time you will (hopefully) trick the plant to not want to produce new growth from those points. Or, if they do, the hope is that the growth is so young and vulnerable going into winter that they do not survive and eventually die-back. You will have to repeat the process for a few years as wisteria are so aggressive (invasive!?!), but hopefully you can get the situation under control.

Monday, July 7, 2008

Spittlebugs in Woodstock, NY

Question:
Hi, we planted five variegated dogwoods on our property in Ulster County last fall and after bursting to life in the Spring they now all have a white sap-like substance oozing from the leaf stems (please see attached photo) at several points.

Would you know what the problem is and how to treat it?. Over time, the leaves die and the problem moves to another part of the plant.

Answer in the form of a question:
Thanks for writing. I can’t make it out quite so easily, so let me ask you a question:
The sap-like substance, is it kind of foamy? Meaning, not very thick and viscous, but more like white foam or froth?

If so I am guessing it might spittle bugs. But let me know a little more and we will try and diagnose more concretely.

Answer to my question:
Yes it is more foamy than viscous. If you can identify we would be really grateful. The plants are at a house in Woodstock. They are the only plants affected like this.

My long-winded answer:
Thanks for the confirmation. I think it is pretty safe to say that what you have attacking your Cornus is a pest called a spittlebug. There are a number of different species of spittlebug but there is one that feeds specifically on dogwood, aptly named a dogwood spittlebug. This might also explain why they are not affecting other perennials or shrubs in the same area. Without seeing the pest myself, I must admit I am guessing, but a confident guess regardless.

Let me first give you some information about their life cycle. Inside the foamy mass of “spittle” there are spittlebug nymphs using their piercing/sucking mouthparts to feed on the delicate new growth of your shrubs. The spittle helps protect them and keep the area moist right around them so that they do not dry out. The nymphs are likely ¼” to ½” long and oval-shaped, and either yellow or yellow-green in color. (there can be some slight variation between species). If you inspect further I am guessing you will find them feeding mostly on the undersides of the new leaves where they are likely to be, again, cool and protected. Nymphs morph into adults with a similar appearance who will feed through the rest of summer and then lay white to beige eggs in rows in the leaf litter this fall.

I am glad that you have noticed them now because this is a good time to treat them. As with most pest issues, if you can find the time during the pest’s life cycle when they are in their most vulnerable form, and then attack them, you have the best chance for successful control. Even though the masses of spittle are pretty gross and overwhelming, you can rest assured that these pests are not likely to kill your Cornus shrubs. Enough damage can deform and stunt new growth, so you might have to do a little pruning late summer or early fall, but at least you don’t have to begin redesigning your garden.

As a first plan of attack I would treat your shrubs with an insecticidal soap. I should say that some believe that blasting the spittle masses with your garden hose on a strong stream is enough to disrupt, destroy and control them. However, if you are dealing with such an infestation then I am going to say let's go ahead and jump to the next step. Available at your local garden center or nursery, insecticidal soap is designed to coat and dry out and/or suffocate small garden pests that feed using their piercing/sucking mouthparts. Sold as a ready-to-use spray, coat the affected areas of your shrubs by spraying to the point of runoff. Remember that the nymphs are most likely hiding in the most protected spots, so be sure to spray the undersides of the affected leaves and stems as well. You will probably have to repeat treatment for a few weeks until you see the situation improve. Of course, read and follow the instructions on the label. Even though tedious, any physical removal of the pests and protective spittle you can do is going to be a help. If the nymphs are exposed to the hot summer sun and stressed out they should not be able to feed with the same ferocity. As a precautionary step for next year, you might choose to rake up and garbage bag the leaf litter this fall instead of leaving it or composting it. Hopefully that way any eggs that adults were able to lay will be removed before they hatch next spring.

If the combination of insecticidal soap and physical removal does not work, let me know and we can try and figure out the next serious step. I think I covered all the bases for now, but if anything is unclear, just let me know. Good luck.

A few days later, the dialog continued...
I will get the spray and saturate the plants to the point of run off this weekend and follow up with further applications. I assume "insecticidal soap" is a readily understood generic term.
One question for now, if I bag the leaves in the fall and hopefully remove any eggs, what are the odds of a new infestation in future years? Is it likely I will have to do this every year or spray early in the spring to prevent it?

And to that I replied:
Insecticidal soap should be a generic enough term and pretty easy to find at a garden center or large retailer. The most common brand name you will find is a company called Safer, so many refer to it simply as Safer Soap. Their products are excellent. I think there is also an organic one made by a company called Concern which we have used in school gardens. Either will work just fine.

There is a chance they might come back next year even though I think you have a good chance of getting the situation under control. Removing the leaf litter will be a helpful practice and then you can lay down some fresh compost or mulch in its place to protect the roots through winter. I’d hold on to the rest of the insecticidal soap as you may find a small population of them next year. But now knowing what you do, you will treat the shrubs again at the first sign of the spittle, and that should wipe out the remaining nymphs. Hopefully by two years the problem will be behind you.

Thursday, July 3, 2008

Ant Infestation!

Question:
Here's a weird problem: for the first time in the three years we lived in our 6th floor apartment we have an infestation of little black ants. Worse yet, they seem to have taken over several potted plants and turned them into "ant hills" by colonizing through the bottom of the pots.
Do you have any suggestions about how to clear them out? I will appreciate any guidance you can offer, as I know the Horticultural Society has been able to help us in the past about other matters.

Answer:
Nice to hear from you. Honestly, that ant situation is a new thing to me. I must admit, though, that I do not know as much about ants as I do other garden pests. This is what I do know:

Ants themselves do not typically do damage to or kill plants. (If they are doing damage to the roots via their tunneling, that might be another story). If ants are present, it is typically because they have found a source of honeydew to feed on. Aphids and other garden pests feed on the leaf tissue and their excrement, technically called frass, is a sweet, sticky substance called honeydew. Large quantities of honeydew on leaves can lead to a dark fungal coating called sooty mold, and can also invite ants to feed.

I would recommend inspecting your plants and seeing if you see any other signs of insects. Be sure to look on the undersides of the leaves and at the nodes, the junctions where stems and leaves meet, as these are safe places for pests to hide and feed. If you find other culprits, (aphids, mealy bugs, etc.), treat your plants with an insecticidal soap, which you should be able to find in the Flower District or at a local garden center. The insecticidal soap will not deter the ants directly, but hopefully it will wipe out any food sources that might be present and they won't be so inclined to stick around. As far as a treatment for the ants themselves, I am sorry to say I do not have a quick answer right now. We have some text here in the Library so I will review that and see what we come up with. Given this day and age I'd probably do some Google searches too and see what others recommend.

Hale Damage and the Topic of Senescence

Question:
We recently had two hale storms on grand island. My hostas were ripped to shreds and I am in the process of cutting them back but was wondering if that might be harmful to next years growth. Not sure if they would be like daffodils and tulips and need the leaves to stay until they yellow. Your help will be greatly appreciated.

Answer:
Thanks for writing. Your assumption is right on target. In the world of horticulture there is a word that gets thrown around called “senescing” or “senescence”. When perennial herbaceous plants, like your hosta, begin to naturally yellow and die back in the fall we call that senescing. (Funny enough the verb “to senesce” can be difficult to find in some dictionaries, especially as it relates to horticulture and biology). And even though plants will senesce at different times of the year, the general premise holds true across the boards. Typically by that point the plant has achieved its fundamental biological goal of flowering or producing cones or producing spores in the hopes of reproducing and staying alive as a species. It has then maintained foliage to continue to photosynthesize and store nutrient and carbohydrate reserves for next year. By the time a plant yellows it has built up enough to leaf out and/or flower next spring and can thus go dormant for the rest of the off season. For this reason, most garden plants, from spring bulbs to late flowering herbaceous species, will be happiest and healthiest if allowed to keep their foliage until it naturally yellows and dies back.

As far as your dilemma I completely understand. Two years ago I was working at a public garden and a hale storm destroyed the majority of the large leaf plants in the woodland garden and we didn’t quite know what to do. I suppose what I would recommend is to leave what leaves you can. Even if the plants look a little lop-sided or sad, it will be best if they can utilize what leaf tissue is left to build up energy reserves before the fall. However, if they are really trashed then you have to do what you have to do, even though not ideal. You will sacrifice this years flower and the plants might get a slower or later start next year, but luckily hosta are some tough plants, so I can’t imagine you will actually lose any. Perhaps the plants will push out a new flush of growth this year, but I don’t want to get your hopes up in case that does not happen.

Thursday, June 12, 2008

Why No Flowers?


Question:
I live in south-east Ontario, near Peterborough and found several bulbs in my garden this spring that were planted by the previous owner of the property. They are 2 to 2-and-a-half inches in size and had quite thick roots. The foliage was about 8-10 inches tall, the colour of daffodils and the leaves very similar too…but less pointed. They didn’t flower. Have you any idea what they might be? I am enclosing shots of the plant and hope that you will be able to use them.

Answer:

It does look to me like those are daffodils you have in your garden. Of course there are many bulbs that have that same foliage and habit, and without a flower IDing them can be tough. As far as why no blooms, my best guess is that it has to do with the nutrients in the soil. Certainly there is enough nitrogen in the soil. Nitrogen is one the macronutrients that a plant relies on, and it helps a plant to produce healthy green foliage and photosynthesize. Another macronutrient that plants rely on is phosphorous, and adding phosphorous to the soil typically helps a plant to produce a larger and more profuse flower. Having a number of bulbs produce foliage but no flower I’m guessing there is either not enough sun or not enough phosphorous. From the photos it seems like the bulbs are getting plenty of light and they ought to be flowering. So, therefore, this is what I would do. This fall when your local garden center or nursery puts out all of their bulb displays, look at the fertilizers they are selling. Each fertilizer has three numbers printed on the label, and those are the percentages of nitrogen, phosphorous, and potash (potassium) respectively in each dose. What you want to find and apply to your yard is a fertilizer with a high middle number. I am guessing you will most likely find it in a granular form. You can apply it this fall and it should break down and leach into the soil over the winter months so that as the roots of the daffodils begin to grow early spring they can get the much needed boost and then go back to their flowering selves. Of course, if you feel your soil has been properly amended and has all of the necessary nutrients then it might be worth getting a soil test done. In fact, if it is a new property a soil test is probably worth doing regardless. It can help you avoid a lot of guessing in the long run.

Tuesday, June 10, 2008

Caring for a Michelia figo

(Michelia figo image courtesy of floridata.com)

Question:
Quick question- I have a Michelia figo, not very big, in a 4" clay pot. I have it on a windowsill where it gets full blazing sun- do you think that's too much? It doesn't seem to be growing much and the leaves look ever so slightly yellowish. (I have kept it watered and fed). Thoughts?

Answer:
I love it when people ask me about a plant I don’t know! Excuse my snooping, but where did you get it?

According to Flora: A Gardener’s Encyclopedia (Timber Press, 2003) the genus Michelia includes about 45 species of mostly evergreen shrubs native to tropical and subtropical Asia. Named after an early eighteenth-century Italian botanist, Pietro Antonio Michele, Michelias are members of the Magnolia family (Magnoliaceae) and those amazingly beautiful and fragrant blossoms are supposed to bloom during summer. They grow best in fertile, well-drained soil and situated in full sun and sheltered from strong wind. Michelia figo is commonly called port-wine magnolia or banana shrub, again because of the rich fragrance, and in its native habitat it can grow to 15 feet tall.

It sounds to me like the sunny spot it is in was the right choice. Depending on when you got it and what the light conditions were like before, it might still be acclimating to its new environment. Luckily you bought it young and small and that is a good thing since younger plants are often more adaptable and can recuperate more quickly to new environments. Just last week I moved some tropical seedlings out to my front stoop and even though I lost a few leaves to scorch, they seem to be quite happy and holding up fine. If it is in a 4” pot then I am assuming you didn’t repot it when you bought it. I would probably do that. In fact I often repot new plants right away just to make sure I know they are then set up for success. Transplanting it into a slightly larger container, say 5-6” in diameter, and giving it some rich, fresh soil you can be a little more certain that it has both the nutrients and the drainage it requires. If the slight yellowing is any kind of nutrient deficiency the repotting should take care of that. Since this is a tropical shrub I would also do whatever I could to increase the humidity. Avoid any drafts from A/C as that can be a quick killer of humidity-loving tropicals. If you have the window open so it can get a little humidity from the outside I bet that would help. Then of course there is what I call “the saucer trick”. Place a layer of pebbles in the saucer so that excess water can collect in that “buffer zone” and evaporate to provide more humidity to the area right around the plant. Even if the soil is moist I might add a little water to my saucers just to make sure I’m keeping the humidity level increased. I’m not typically one that mists my plants, but if you do then an early morning misting before the hot midday sun might not be a bad thing. Lastly, you could incorporate a balance fertilizer into your watering regiment for the summer, but in the long run I would just rely on regular watering and transplanting again with fresh soil in a few years.

Hope this helps. If you get your Michelia figo to flower be sure and send a photo my way!

Wednesday, June 4, 2008

Japanese Holly in Distress in Eastern Massachusetts

Question:
I planted a japanese holly about a month ago in the northeast corner of my house. I was watering it pretty regularly but went away for a week. When I watered it today, almost all of the leaves fell of. All I had to do was touch a leaf and it would drop although the leaves were still green and not browned. There are some tiny bud/flowers and the plant looks green. Has it been underwatered? overwatered? underfertilized? not enough sun? I would appreciate any advice.
Oh, and it might help if I told you I live in eastern massachusetts.

Answer:
A little transplant shock is typical, but this sounds much more severe. If your Japanese holly does not get quite enough sun then it will thin its lower, interior leaves. This interior thinning will also happen as plenty of new growth emerges from the tips of the stems and the plant grows larger. However, all that usually happens over a longer period of time, so I’m a little unsure as to why you are having so much leaf drop so quickly. I guess my mind then goes to other planting or cultural issues. I hope the rootball didn’t suffer too much damage when planted. Whether containerized or balled and burlapped it is important to keep the rootball as in-tact and protected through the planting as possible. You can and want to rough up the roots around the edges a bit to encourage them to grow out and down but never want to put too much pressure on the rest of the root mass. You should have planted the shrub so that it is level with the soil around it. Many used to advise to prep the hole twice as wide and twice as deep as the rootball, but now the consensus is that you do not want to dig too deep because you do not want the plant to settle and then have the crown of the plant below the soil line. If the shrub is planted too deep then you can run the risk of rot and the roots not getting the fresh air that they require. After planting I would “water in” the shrub by putting the hose on a slow trickle and letting it sit and soak the roots for an hour or so. Following that I would water a newly planted Japanese holly two or three times a week early in the day for an hour or two each time. For this, using soaker hoses with a battery operated timer can be a great help and make it easy on you. Regular and evenly spaced watering is a proper horticultural practice I can't talk up enough. If the shrub goes a week without water then obviously water it when you return, but do not then over-compensate and flood the plant. I always make the analogy that if you are dehydrated you do not then try and drink a gallon of water in one sitting, you sip, slowly and over a period of time, and then you will begin to feel normal again. In this respect plants are not all that different from humans. The dehydrated roots will not know what to do with such an excessive watering and you can do harm when you are trying to do good. Again, I might expect some leaf drop, but not like what you have described. And being away for a week should not send a woody shrub like that downhill so fast. On the remaining leaves, examine the undersides of the leaves and the nodes, the junctions where leaves and stems meet, and tell me if you see any sign of insects. Look at the base of the plant and make sure it is not too deep. If so, you might have to pull it out and replant it raised up a bit. For trees and shrubs people will tell you to err on the side of planting too high instead of planting too deep. Also, since this occurred so fast, call the nursery and explain the situation and ask if other people’s new hollies have been suffering too. There might have been something affecting the whole batch that no one had noticed before a bunch of them were sold. As far as winter hardiness, I believe that the holly should hold up where you are living. (Otherwise why would a nursery have sold it to you?). Some references say that they are only hardy to Zone 6 and I bet you might be a bit colder up there, but I am sure I have seen these broadleaf evergreens up that far.

Hmm, very interesting. Of course, if you have a digital camera you can take and email me some pictures and we can see if that helps me diagnose the situation any better. Think through the planting process you underwent and let me know if any other factors may have come into play. I’ll keep thinking too.

Starting a Kitchen Garden Indoors

Question:
I'm hoping to start an indoor kitchen garden, but of course my options -- like my space -- are limited. I'm thinking of growing a range of herbs in a pebble garden, as well as a Meyer lemon tree, and maybe a fig tree, though I've heard those aren't fruit-bearing when grown indoors. Any other suggestions for hardy indoor plants that can be put to use in the kitchen?

The room only has one window, in a corner, facing West. Not the best situation, but I was thinking of supplementing the natural light with a fluorescent bulb. The living room has better light, but there's a cat out there that'll apparently eat herbs, so unless I can figure out a way to build a shelf halfway up the window frame, it looks like I'm going to be gardening in my bedroom.

Answer (for now):
Given your limited space and light I would suggest starting your indoor kitchen garden in stages. This way you can begin with a few options that are typically easy and reliable, see how those plants fare, and then move on and branch out from there. Quickly before I forget, large fruit bearing trees can be a real challenge to grow indoors and yes, getting them to fruit properly can be extremely difficult. They need greater variation between daytime and nighttime temperatures, some seasonal temperature fluctuation as well, good airflow and circulation, and much more sunlight. I am sorry to say, but a few windows in an apartment that stays a constant 70-something degrees throughout the year is not going to be the easiest or best environment.

So, let’s talk about things that work. I have a close friend and coworker who grows a ton of herbs in her apartment in Brooklyn, specifically in an East-facing window. Every year she enjoys growing from seed or propagating from cuttings basil, cilantro, parsley and dill. When I asked her opinion she also mentioned that she enjoyed growing sweet marjoram a few times, and can keep rosemary going pretty if it is already a decent size. Depending on your level of patience you can try starting seed or you will be able to find all of these in small pots for cheap at the Farmer’s Market in Union Square (open Wednesdays, Fridays, and Saturdays). If you opt for starting the seeds yourself, sow them as the packets suggest, water the seeds and soil well, and then cover your pots with Saran Wrap, or some such equivalent. This will seal in moisture and humidity for the period of time it takes for the seeds to germinate – essentially creating a mini greenhouse in each pot. After a few days or a week you can poke some holes in the Saran Wrap to slowly begin acclimating the seedlings to your much drier apartment. When the seedlings reach the Saran Wrap you can remove it, keep the seedlings moist on a regular basis, and perhaps the occasional misting with a fine spray bottle. Avoid direct exposure to A/C or any other strong wind source that might dry out the fragile new foliage before it matures and hardens off.

Let me know if this is helpful and any other questions you may have. Fruits and veggies will be harder to do in your conditions, but if and when you feel like taking on that challenge we can definitely help with both library references and personal testimonials.

Tuesday, May 20, 2008

Cotinus Care in Yonkers

Question:
Oh please tell me that it is still OK for me to prune "my baby" which is really starting to make me very worried. It is more like a tree than a bush/shrub and I've let it grow to high and I did not prune it hard by March 31. I did prune back the long branches but the base of the "shrub" is more like a tree shape having a right and left side with the middle having been destroyed in a hurricane two years ago. This year, only the left side is beginning to leaf with the right side still bare but amazingly, growth pushing up from the bottom. The leafless right side is alive - how do it know? - if I prune off a small branch, the smell is there and if you scrape the bark, you see green. I would estimate it's overall, crooked height to be about 5' tall.

So, after having read your article and only having about 10% of the shrub/tree in leaf, my question is:

Can I safely prune back now/today to approx 3' tall, fertilize and keep moist, and hope that it will begin to leaf more evenly?

This is the Queen of my Garden and I must save it and restore it to its overall beauty. I don't care if it flowers; I just want all the leaves to return all over the plant and enjoy them as they sway in the breeze and look like silver when it rains.

thanks for your help; it is greatly appreciated.

I asked if she could send me some photos to get a better idea of the situation and here is one:She also added:
Incidentally, I lost my first one. Following its demise, I sent a soil sample to Cornell in Illinois (I think) because I suspected verticillium wilt and I know this shrub does not do well under these conditions. I hope this one is not falling prey to the same fungus.

To date, I have fed it with Plant Tone but if there is something else that I should use to strengthen it, please let me know.

To all this I answered:
The left side I doubt is going to come back. There might be some green left in the tissue but it is not going to come back nearly as well as it once was, if at all. Cut the left side back to the ground and remove that dead stalk entirely. I also see that there is a stub in the middle which looks like it stands about 4”-5” tall with no growth. Cut that back to the ground as well. Since you are getting all that new growth from the bottom you might as well capitalize on that, even if it is not the ideal situation. It means in the long run the shape of your Cotinus will be quite different than the tree form it was, but it will certainly survive, and that’s the important thing. Cutting back that dead wood on the left side and in the center will continue to push out new growth from the base and you will end up with more of a shrub form. Ideally I would suggest cutting the right side stalk back all the way to the ground too, but since right now that stem has most of the plant’s foliage on it, I’m going to say hold off on that for now. In order for the Cotinus to have the best chance of survival, I am sorry to say it might look a little funny for this season, but with proper, spaced-out pruning it can still be a beautiful presence in your garden. On the right side I would remove any shoots that have no growth on them, of which I see a couple in the photograph. Prune them back to the next branch or trunk where there is healthy growth and foliage. While the shrub pushed out new growth from the bottom and establishes new leaf and stem tissue you want to remove as little living tissue as possible. As a general rule of thumb, you can always remove dead wood from a tree or shrub, but you want to allow the healthy parts of the plant to come out of dormancy and grow with as little stress as possible, especially early in the season. So, you will be left with a bunch of growth from the base and the “odd ball” stalk on the right side. Like I said, it will look funny, but if you remove the right side now the shrub might suffer too much stress. Therefore, I would remove the right stalk back to the ground, like the left and center pieces, but not until next winter. Next spring your Cotinus will then be a shrub form with new growth flushing out from all sides and you can prune it lightly to give it a better shape.


Regarding the fertilizer and verticillium wilt:
Do not go crazy fertilizing your shrub right now. If you have applied some Plant Tone to your garden this spring that is fine, but when it comes to perennials and shrubs, your plants are going to be happier if you don’t overdo it. Annuals and tropicals and turf can be “heavy feeders” as we call them, but over-fertilizing perennials and woody plants can force them to produce more stems and leaves than they want to and that can lead to unnecessary stress. Once established in the landscape shrubs have their own agenda and know their abilities and limitations based on the conditions they are living in, and often we should live with that instead of over-compensating to force what is not natural. Especially as a plant gets older it adjust to the nutrients in the soil and often does not want too much extra coddling. Also, regarding diseases, always be sure that you are taking care of the cultural needs of the plant before jumping to conclusions about dieback being the effect of a certain disease. Because a plant can be susceptible to a certain disease does not mean that that is your answer. I have been working closely with Cotinus for easily 10 years now and I can comfortably say that I have never seen one die because of Verticillium Wilt. Often irregular watering, soil that doesn’t drain properly, or being situated in an area without enough sun, those are often the culprits. If you do suspect a disease is present, be sure to familiarize yourself will all of the symptoms so that you can diagnose with the greatest degree of certainty. And either way, remember that proper plant care is always the best solution, disease or not.

Caring for a 30+ Year-Old Miniature Rose

Question:
I have a miniature rose bush, thirty plus years old. It has done very well over this length of time, however, we have moved two times since Spring 2006. I first transplanted it in a sunny location facing West when we moved in the Spring of 2006 and it did well (even though it developed a fungus and I had to spray it with a rose fungicide when the leaves had a grayish coating on them). It bloomed well the rest of the summer. When we moved to this house in the Fall of 2007, I planted it once again in a sunny spot (this time facing South). Now, after looking good the remainder of that Fall and earlier this Spring, although it has flower buds there are no leaves. Can something be eating them, or as a local nursery employee suggested, could it be in a location where there is poor drainage? There are some darkish colorings to part of the stems.

Thank you for any light you can shed on this problem. I would hate to lose this very nice plant.

Answer:
Two moves in two years is a lot of stress for a shrub that is over thirty years old. Young plants can often bounce back pretty quickly while for older and more mature plants it can be harder for them to recuperate. Just so you know, it might be a couple years before you are sure that the rose is ok in its new home and on the road back to recovery. And even though people then (I especially) often try and overcompensate with more action, sometimes the best plan of attack is simply good observation and patience. As long as the spot gets over 4-6 hours of direct sun and has good air circulation the rose should be able to photosynthesize and put out a new flush of foliage. The question and concern about drainage is an excellent one, especially if you see any darkening of stems which can be a sign of rot. Next time there is a heavy rain go out and inspect the area to make sure there is no sitting water that is not draining quickly enough. Also make sure your rose is planted high enough. It is important that you can see the flair at the bottom of the branches where the roots begin. If the shrub was not planted right at or a tiny bit above the soil line then the roots might not be getting the fresh air they need and the stems might be in contact with too much moisture, which they do not want. Make sure that the rose is not too crowded – they do like their space. If you mulch, a thin layer would suffice and again, avoid any major mounding of soil or mulch around the crown of the plant. I hope you do not have to move it again or take any major action that might only add stress, but keep me posted and hopefully I can help you keep your miniature rose healthy and beautiful.